Tuesday, April 12, 2011

Fabric Flowers

How many of us have a "Stash" of fabric that we just don't know what to do with?  It's too large to throw away and too small to really make anything with?  I am guilt of this in a big way.  OK, two big bags full of guilt.  I have a boy bag and a girl bag.  Today we are going to use the girl bag and make fabric flowers.

Supplies:
Fabric- 6, 1.5" x 14.5" of colorful fabric for flowers
Fabric- 6, 1.5" x 5" of green print and solids
Scissors or Rotary Cutters to cut the fabric
Wrapped Floral Wire- 12 pieces 18"
Wire Cutters to nip the floral wire
Tube Turner Kit- It's ok if you don't have a kit.  A straw and small rod will do.
Needle-Nose Pliers or fingers

Have fun while choosing your fabrics.  Mix many different textures and patterns.  I found scraps that matched the quilt we made for Katie. 

1.  Match flower fabric to stem fabric.  Make pretty combinations.  Sew stems to flowers using 1/4" seam.

2.  Fold the sewn strips in half with right sides together and stitch each strip lengthwise with a 3/8" seam starting with flower fabric.  Stitch until 1/4" from bottom edge, then make a right angle turn and continue until the end.  Backstitch to secure.


3.  Cut raw edges and turn right side out with tube turner. 

 How to use a tube turner: 
  • Slide the tube all the way inside the sewn fabric.
  • With the rod push fabric into the tube until it protrudes out the opposite end of the tube.
  • Grasp the protruded end of the fabric and pull the fabric through the tube leaving the rod inside.
  • Use the rod to square up the corners of the material.  Remove the rod.
4.  Insert floral wires into each tube of fabric.


5.  With pliers turn under raw edges.


6.  We are going to make two differend flowers:

      Bud- Loosely ball up the bud like you are rolling yarn, but not tight.
  
 Posey- Roll into a snug spiral.  It will look like a jelly roll on a steam.
You can use your fingers or needle-nose pliers.  Once you get to the stem/green bend and push into the flower so it looks like the flower is growing out of the stem.  If you don't like how your flower has grown- Don't worry, you can un-roll and try again. 

7.  Repeat with each tube.  When finished with each tube tie off with a piece of fabric or ribbon.
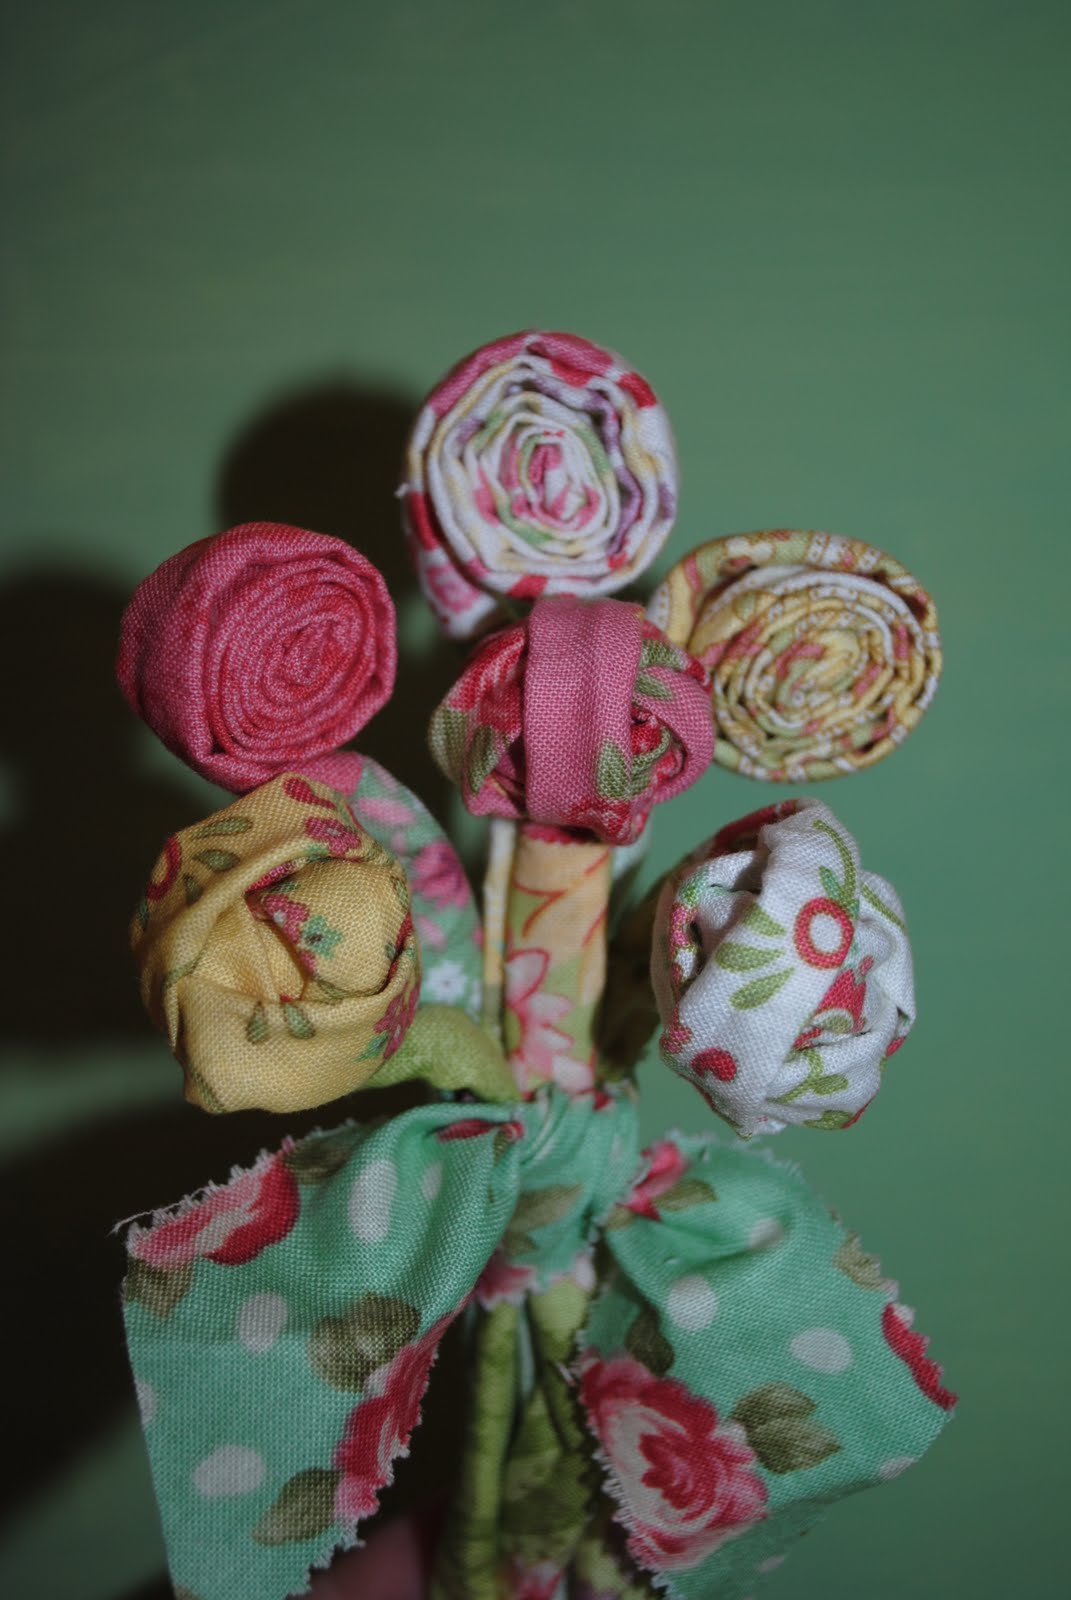

Who do you know that needs a little kindness?  Make them a bouquet of flowers...

I am going to leave you today with the wise words of Mark Twain-

Kindness is the language which the deaf can hear and the blind can see. 
•

Monday, April 11, 2011

Angel Bites

I have a LOVE for Angel food cake and sixlets.  I also have a LOVE for simple and easy.  So I had to come up with a way to combine all three.  I think they look cute also.


Angel Bites
1 store bought Angel Food Cake (unless you have extra time to bake)
1 can of frosting (I like to use the whipped cream cheese)
White Almond Bark
Icing Colors
Pack of Sixlets
Wax Paper

1.  Crumble cake into mixing bowl.

2.  Combine frosting with the cake with hands.  I know, I know this is messy and yucky, but it is the only way to really mix the two.  You can always use the little hands you have around the house to help out.  If you really want to be creative you can mix a little of the icing color to make the balls very colorful or add a Sixlet into the center.  Put into the fridge to set for about an hour.

3.  Make small balls with the cake mix.  I like to make them bit size, but you can make them larger.  Put the balls into the fridge or freezer for an hour.

4.  While the balls are in the fridge/freezer open the Sixlet packages and put into a bowl.

5.  Melt the almond bark using the directions on the package.

6.  Pour the almond bark into small bowls.  Use a different bowl for each color you are using.

7.  Add small amount of icing color to each almond bark bowl.  Mix you no longer see the white color.

8.  Take enough balls from freezer that you will use for each color.  Make sure the balls stay cold or they will become hard to work with.

9.  Dip each ball into colored almond bark.  Place onto wax paper to set.  Press a Sixlet on the top of each bite before the bark sets.


Simple and tasty treat ENJOY! •

Sunday, April 10, 2011

Pretzel Butterflies

 May the wings of the butterfly kiss the sun
And find your shoulder to light on,
To bring you luck, happiness and riches
Today, tomorrow and beyond.
~Irish Blessing


Chocolate Pretzle Butterflies

Pretzle Rods
Tiny Twist Pretzles
White Almond Bark
Colored Sugar
Sixlets

1.  Melt Almond Bark according to package.
2.  Lightly dip one end of rod into melted bark.  Lay onto wax paper. 
3.  Dip 2 tiny pretzels into bark and attach to sides of rod.  I like to prop mine up to look like they are flying, but you can lay them flat.

4.  Once the wings have set re-dip into the melted bark.

5.  Sprinkle with colored sugar.


6.  Attach eyes (Sixlets) with melted bark.


Look I caught 2 butterflies!


These cute Butterflies will make special Easter goodies.
Wrap in a cellophane bag and tie with cute spring ribbon.

•