Showing posts with label Fabric. Show all posts

Saturday, June 11, 2011

Fabric Clips

What can you do to make clips fun to work with?


BORING!


Add fabric scraps.
Our answer to everything!

This is a super easy way to add pizazz to plain clips.

Supplies:
Clips
Fabric scraps
Mod Podge
Scrap paper
Paint brush
Scissors or Rotary cutter


1.  Make template out of paper.  Trace clip onto paper.


2.  Cut fabric out of template.  Make sure to clip stray threads.


3.  Paint Mod Podge onto one side of Clip.  Start by placing edge of fabric with round part of clip.  Keep applying Mod Podge and fabric.  Rub fabric to get out any air bubbles.


4.  Hang clips to dry.  Apply another coate of Mod Podge.  This will also stop fraying of fabric.


5.  Now get to work and have FUN.


I use my clips on my hat hoop.


How will you use your clips?

Doing nothing is very hard to do...you never know when you're finished.
~ Leslie Nielsen ~
•

Tuesday, May 17, 2011

Book Purse

Today we are making a Book Purse.  Yes, that is correct a Book Purse.


Supplies needed-
1 book (I really like the covers of Readers Digest)
1 purse handle set
fabric
ribbon or elastic
1 button
fabric glue
cardboard


Cut the pages and binding with an exacto knife.


Measure the book while open flat.
Add an inch to both length and width to make the lining.
Now cut fabric to width and length.
Fold fabric 1/2" under on all sides and iron.
Sew 1/4" seam for a finished look (you don't have to sew).

Cut 2 strips the size of book spine out of cardboard.


Stand the book on its end with the cover open at a 45 degree angle.  Trace around the book and make a line straight across the open end.  To each side add 1/2" and cut out.  Fold fabric 1/2" in and iron flat.


Fold the fabric in half and put long side of template on the fold of fabric and cut.  Rights sides out glue together (the edges do not need to have a clean look).  You will need 2 pieces for each end of the purse.


Cut ribbon into 4, 4" pieces.  Center purse handle.  Slide ribbon thru handle of purse and hot glue to book.  Repeat with other end of handle and other purse handle.

Cut 2 strips of ribbon or elastic to make loop for button, hot glue 1 loop/strip centered between handle.  Thread 2nd strip thru button and tie a knot under button.  Make sure the button can slip thru the looped strip on other side of purse.  Hot glue to center of handle

Hot glue the tips of triangles to the inside of the spine of book (make sure you have enough fabric to cover edge of book).  Hot glue 1 cardboard strip into the spine- covering the fabric tips for support.

Attach the fabric triangles to the sides of the book using fabric glue (I do not recommend hot glue because it will show.)  Let dry.


Now attach the lining with fabric glue starting at one long edge of book and glue down and work your way to the other side.  Press with your fingers to get out any air bubbles.  Clamp while drying.

Cover 2nd cardboard strip with fabric and hot glue into the inner spine.  This will flatten the lining and offer more stability. 


I am sorry that I don't have pictures for all of the directions.  I was so into making the book I forgot to get the camera into gear.
I hope you noticed the "Way to Geaux Meaux"- this is a special purse for my Grand-Daughter's Graduation.
WAY TO GEAUX MEAUX
We are so proud of you!
•

Tuesday, May 10, 2011

Fancy Camera Strap

Katie needed a Mother's Day gift to give to her Mimi.  Asking her a few questions about her Mimi we decided she needed  a Fancy Camera Strap.  The best part of this gift it is another quick, simple and cheap inexpensive gift.

I let Katie go thru the STASH of fabric.  She dug until she hit bottom and pulled a bag that was all but forgotten.  Sad- because it was a special bag of fabric from our trip to New York.  Yes I have to confess I am an addict.  My name is Suzette and I am a fabric addict.  This bag was full of scraps and a couple yards of this beautiful, lovely and dreamy fabric.  HUM...


When purchased I had all intension of making a lovely dress.  But, y'all know how that goes...I will make the dress when I loose a few pounds.  Well a year later and I am on the road to sewing my dress.

OOPS- I got a little side tracked.  Back to the making of the Fancy Camera Strap.

Supplies-
2- fabrics 2.75" x 27" or 1 piece 5.5" x 27"
fusible fleece interfacing (not needed, but I like my straps with a little padding) 5" x 27". 

1 Sew fabric with right sides together.

2 Iron seam open
3 Iron interfacing according to directions (remember to use damp cloth while ironing).  Trim extra interfacing.

4. Fold each end 1/2" and sew finished.
5. Fold each end again 1/2" and sew finished (this give a little polished look).  Sew 3 times to give a refined look.
6. Sew right sides together using a 1/4" seam and trim.

looks like we are in need of a ironing board tutorial

7. Turn strap outside right and iron.
8. Slip onto camera strap.
9. Go out and enjoy your new Fancy Camera Strap. 


I am nosy, so send me pictures of your adventures with your new Fancy Camera Strap.

There are always two people in every picture:  the photographer and the viewer.  ~Ansel Adams
•

Sunday, April 17, 2011

Babushka Babies

I am so excited about the Spring Fling Gift Exchange that was held over at Living My Life on Purpose.  Each person who signed up for the exchange sends a gift to the person who commented before you.  You get a gift from the person that commented after you.  I thought this was a great idea!

What do you think about Gift Exchange?  Would that be something you would be interested in?  Maybe we can do a Summer Gift Exchange.  I always enjoy getting goodies in the mail.

I did a little research on the person that I am sending a gift and found out she has two little girls.  So, I am going to send a little goodie for her girls.

Babushka Babies


Super easy to make!
(if you have an embroidery machine)

I found this wonderful design at Digitized Creations.

Supplies needed:
In-The-Hoop Stuffed Matryoshka - Babushka Doll Design
Fabric Scraps
Tear-Away Stabilizer
Thread
Needle
Poly-Fiber Fill
Love

1.  Place hood fabric into hoop with stabilizer.


2.  Tack down Face & lower Body fabric.  Do not over lap.

3.  Trim around face and lower body.  At the bottom of body leave a little extra fabric for sewing together at end of project.

4.  Sew hair, eyes, cheeks and out line face and bottom of hood.


5.  Sew placment around entire body.

6.  Place doll backing fabric in hoop FACE SIDE DOWN.  Sew out line stitch- bottom will stay open to fill with stuffing.

7.  Remove from hoop and tear away stabilizer.  Cut around doll 3/16" to 1/4" leaving extra across the bottom. 


8.  Turn doll right side out.  Fill with stuffing and love (One can never have tooooo much love!)  Turn raw ends inside and pin.  Hand sew opening closed, using whiped stitch.

9.  Snuggle because they are so darn cute.

Little girls love dolls. They just don't love doll clothes. We've got four thousand dolls and ain't one of them got a stitch of clothes on.
Jeff Foxworthy


•

Tuesday, April 12, 2011

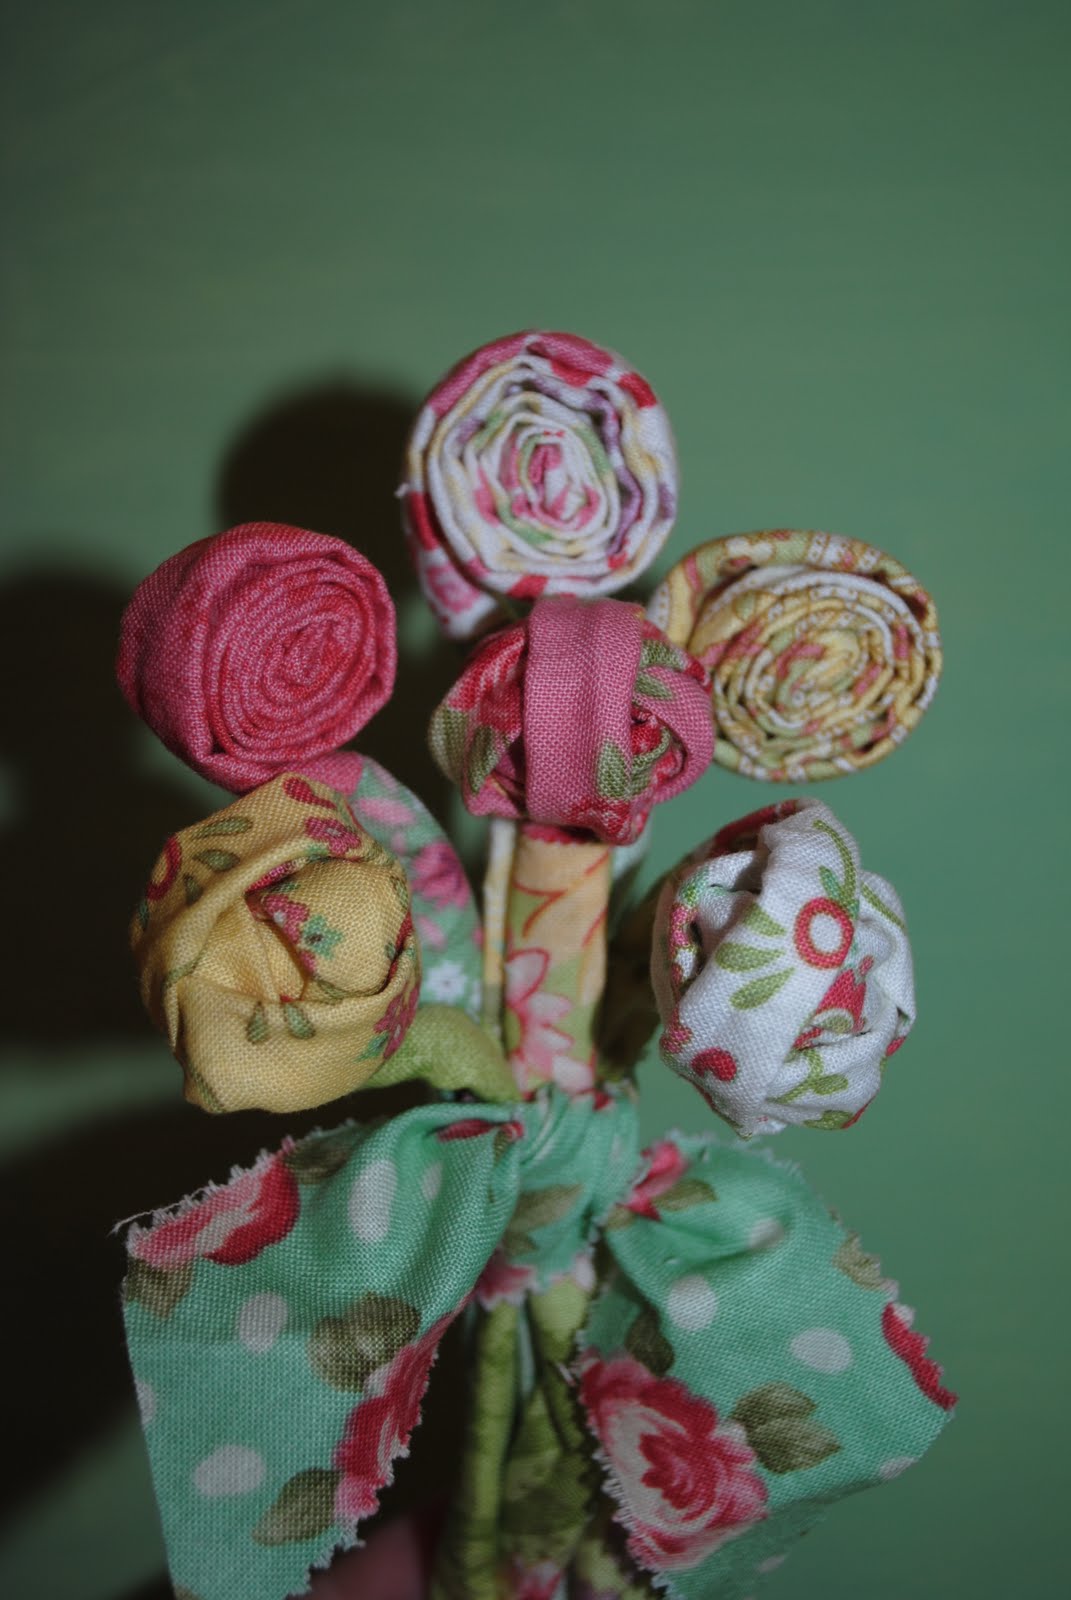
Fabric Flowers

How many of us have a "Stash" of fabric that we just don't know what to do with?  It's too large to throw away and too small to really make anything with?  I am guilt of this in a big way.  OK, two big bags full of guilt.  I have a boy bag and a girl bag.  Today we are going to use the girl bag and make fabric flowers.

Supplies:
Fabric- 6, 1.5" x 14.5" of colorful fabric for flowers
Fabric- 6, 1.5" x 5" of green print and solids
Scissors or Rotary Cutters to cut the fabric
Wrapped Floral Wire- 12 pieces 18"
Wire Cutters to nip the floral wire
Tube Turner Kit- It's ok if you don't have a kit.  A straw and small rod will do.
Needle-Nose Pliers or fingers

Have fun while choosing your fabrics.  Mix many different textures and patterns.  I found scraps that matched the quilt we made for Katie. 

1.  Match flower fabric to stem fabric.  Make pretty combinations.  Sew stems to flowers using 1/4" seam.

2.  Fold the sewn strips in half with right sides together and stitch each strip lengthwise with a 3/8" seam starting with flower fabric.  Stitch until 1/4" from bottom edge, then make a right angle turn and continue until the end.  Backstitch to secure.


3.  Cut raw edges and turn right side out with tube turner. 

 How to use a tube turner: 
  • Slide the tube all the way inside the sewn fabric.
  • With the rod push fabric into the tube until it protrudes out the opposite end of the tube.
  • Grasp the protruded end of the fabric and pull the fabric through the tube leaving the rod inside.
  • Use the rod to square up the corners of the material.  Remove the rod.
4.  Insert floral wires into each tube of fabric.


5.  With pliers turn under raw edges.


6.  We are going to make two differend flowers:

      Bud- Loosely ball up the bud like you are rolling yarn, but not tight.
  
 Posey- Roll into a snug spiral.  It will look like a jelly roll on a steam.
You can use your fingers or needle-nose pliers.  Once you get to the stem/green bend and push into the flower so it looks like the flower is growing out of the stem.  If you don't like how your flower has grown- Don't worry, you can un-roll and try again. 

7.  Repeat with each tube.  When finished with each tube tie off with a piece of fabric or ribbon.


Who do you know that needs a little kindness?  Make them a bouquet of flowers...

I am going to leave you today with the wise words of Mark Twain-

Kindness is the language which the deaf can hear and the blind can see. 
•