Thursday, April 28, 2011

Paper Coterie Open House

Please join us in celebrating the
official launch of


Visit Paper Coterie and let us know what you are going to order.

We are thinking the Swatchbooks are just the cutest!


Wednesday, April 27, 2011

Trash To Treasure

I am so excited when I see post about how people find trash on the side of the road and turn it into treasure.
 
It puts a big smile on my face when I see a book shelf re-stored.
It tickles my fancy when an old chair gets new springs.
It warms my heart when a beat up box gets a new life.
It fascinates when a man's shirt becomes a ladies dress.

Now that I have shown how much I love what people find on the side of the road.

This is what I FIND!?!? 


A Kitten!!!

NO- not a book shelf
NO- not a chest of drawers
NO- not a chair
NOPE- I get a Kitten

I get lucky with a new addition to the Zoo.
Have I ever menitioned that I have
hold on to your seat

4 dogs
3 cats
1 bird
2 humans

I keep telling everyone that the Zoo is closed,
but some how I'm always at the right place at the right time. 
Or- the wrong place at the wrong time.

I guess my heart is warming to the little fellow, so now I get to take my
trash and turn it in to the best treasure of all.

LOVE

One man's trash is another man's treasure
As one woman's junk gives others pleasure.
Tom Zart

Monday, April 25, 2011

ChalkBoard Tray

How do you give a gift without spending ZIP? 

Search your cupboards and you are sure to find an old metal tray. 

Now look through you stash of paints.  If you are anything like us you will find an array of paints.  I choose to use my lovely chalk paint.  I have used this jar for many projects and it is still quite full.


Next drill a small hole into the top of tray. 


Paint the tray. 
You will need a few coats of chalk paint (each application must dry for 24 hours before you re-apply).


How was this for easy???

Now you have a special gift or do you give yourself a gift?
I think you deserve a goodie.

One last hint -
It is also a magnet.

Lewis Carroll


Wednesday, April 20, 2011

Book Lamp

What an honor to be Guest Posting at
Be Different Act Normal.

We are Chameleon Girls the Mom & Daughter craft fighting team.
Together we tackle sewing, cooking and crafts.

Today we are making a
House Warming Gift for a Librarian???

A Lamp made of Books


What do you'll need to make lamp?

Hard Cover Books
Ruler
Pencil
Drill & Bit large enough for lamp rod to fit
Lamp Kit
4 Wooden Feet
Wooden Base
 Epoxy Glue!!!
Mod Podge- Matte
Lampshade
Light Bulb
Paint- Brown and Black

1.  Glue the wooden feet to the base.  We used a wooden plack from Michaels.  We did not need to sand (insert smile).


2.  Paint the base and feet brown.  Mix black paint with water to make runny.  You do not need to make much.  Paint base & feet black wipe with damp cloth.  This will give you an old weathered look.


Yep that's the color we want.

3.  Stack books to see how many you will need.

4.  Measure center of base and books with ruler and pencil.


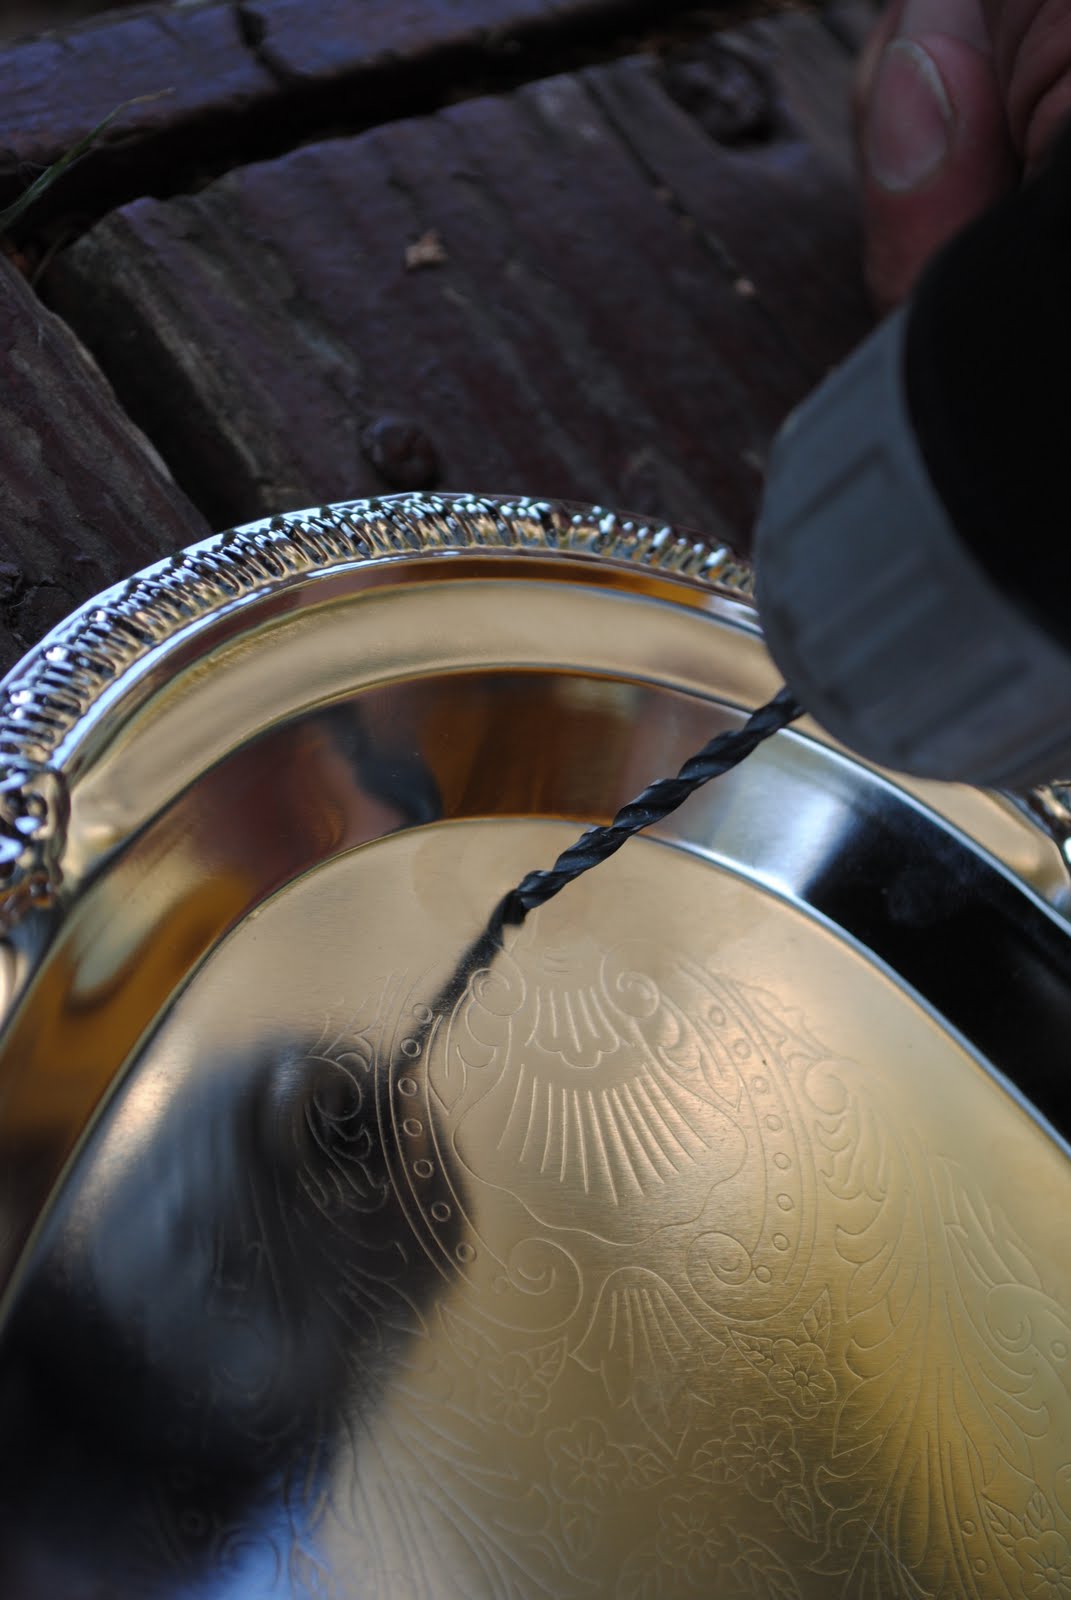
5. Drill base and each book.  You will want to grab an old telephone book for this, so you don't drill a hole into your table.


6.  Slid your thread rod through the hole.  Screw on the nuts and tighten against the washer.  For stability, it is best to start with the largest book.  Play around with the books to see that you like the combination.  Take a picture so you will remember what your stack of books look like.

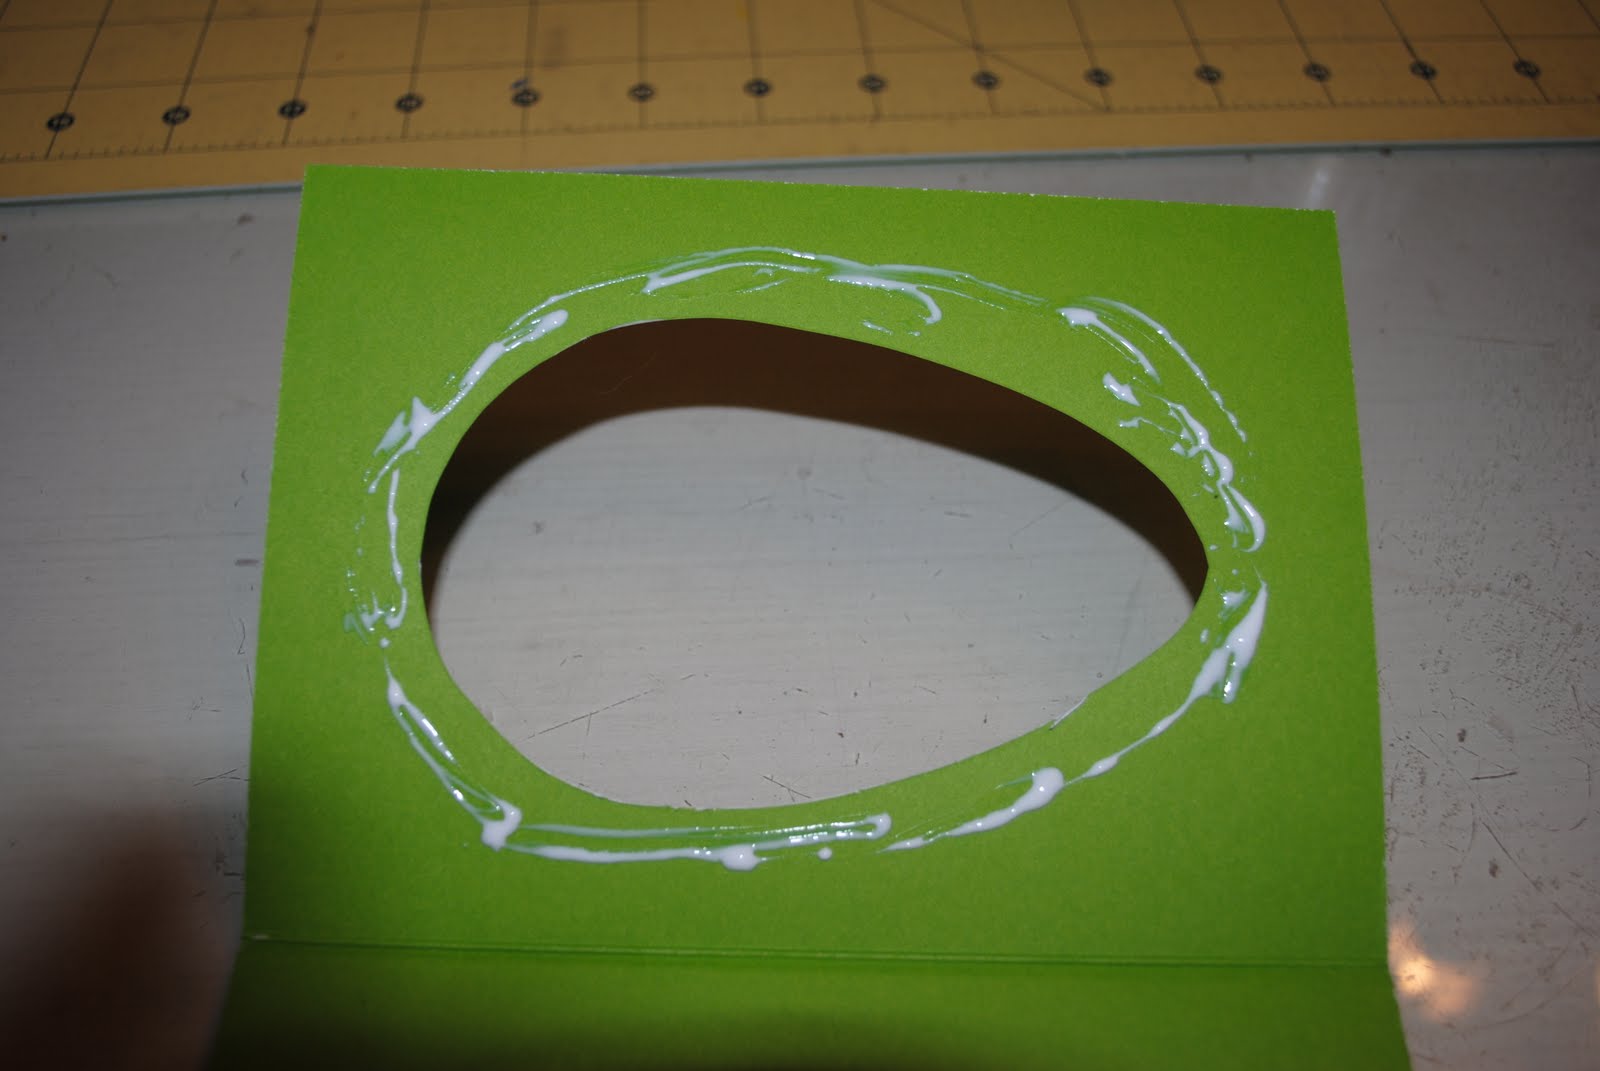
7.  Glue the largest book to the base and then each book- big to little
BTW- do not use plain glue, use Epoxy Glue!!! 
We used Gorilla glue- bad, bad, bad!
It dries yellow and fluffy, not clear. 


7.  Smash, Smash, Smash the books!!!! 
It will seem like the books are bubbled, but keep at it.


8.  Slide a washer and nuts on top of last book and screw down tightly. 
With all your weight you will need to squish the books as you tighten the screw. 
I do mean ALL OF YOUR WEIGHT!  I was on the books with my knees. 
Did I mention SMASH the books down?

9.  Now that the books are nice and tight- Mod Podge the book pages.

10. Follow the directions on the lamp kit.


Did I mention the room-mate works at a Coffee House?
We are going to re-do the lamp shade with....
You guessed right!
COFFEE

Stay tuned-
The Coffee Lamp Shade is for another day

If you want a love message to be heard, it has got to be sent out. To keep a lamp burning, we have to keep putting oil in it.
Mother Teresa


Come visit us at
Chameleon Girls
to see other craft battles we have won.

Refurbished Tile Coasters


Swirly Finger Nails


Pretzel Butterflies


Monday, April 18, 2011

No-Sew Ribbon Rubber Gloves

We have seen lots of beautiful Fancy Rubber Gloves.   So we wanted to come up with our own version.

NO-SEW Ribbon Rubber Gloves


Supplies:
Rubber Gloves (check under your kitchen sink)
Ribbon
Exacto Knife
Ruler


1.  Measure across top of glove while pulled flat.  Mark with pin the center of glove.  Mark with pencil 1" from center.  Continue in both directions marking 1".  You will end about 1/2" from edge.  Then mark from center on both sides 1/4".


2.  Cut with Exact Knife each mark the size of your ribbon.  Make sure you cut both layers while cutting.  This way you only have to cut 6 times (and the cuts are lined up).  If you wold like to have the ribbon gather cut the slit smaller than the ribbon.

3.  Feed your ribbon starting from either slit from the center of glove.  This way your bow will be on top.


Do you ever have that last second gift?  Teachers, Neighbor, Friend.... Now you have a quick, easy, no-sew present.

Love is a fruit in season at all times, and within reach of every hand.
Mother Teresa

Sunday, April 17, 2011

Babushka Babies

I am so excited about the Spring Fling Gift Exchange that was held over at Living My Life on Purpose.  Each person who signed up for the exchange sends a gift to the person who commented before you.  You get a gift from the person that commented after you.  I thought this was a great idea!

What do you think about Gift Exchange?  Would that be something you would be interested in?  Maybe we can do a Summer Gift Exchange.  I always enjoy getting goodies in the mail.

I did a little research on the person that I am sending a gift and found out she has two little girls.  So, I am going to send a little goodie for her girls.

Babushka Babies


Super easy to make!
(if you have an embroidery machine)

I found this wonderful design at Digitized Creations.

Supplies needed:
In-The-Hoop Stuffed Matryoshka - Babushka Doll Design
Fabric Scraps
Tear-Away Stabilizer
Thread
Needle
Poly-Fiber Fill
Love

1.  Place hood fabric into hoop with stabilizer.


2.  Tack down Face & lower Body fabric.  Do not over lap.

3.  Trim around face and lower body.  At the bottom of body leave a little extra fabric for sewing together at end of project.

4.  Sew hair, eyes, cheeks and out line face and bottom of hood.


5.  Sew placment around entire body.

6.  Place doll backing fabric in hoop FACE SIDE DOWN.  Sew out line stitch- bottom will stay open to fill with stuffing.

7.  Remove from hoop and tear away stabilizer.  Cut around doll 3/16" to 1/4" leaving extra across the bottom. 


8.  Turn doll right side out.  Fill with stuffing and love (One can never have tooooo much love!)  Turn raw ends inside and pin.  Hand sew opening closed, using whiped stitch.

9.  Snuggle because they are so darn cute.

Little girls love dolls. They just don't love doll clothes. We've got four thousand dolls and ain't one of them got a stitch of clothes on.
Jeff Foxworthy


Thursday, April 14, 2011

Easter Egg Card

What can you make with these items?

(looks like someone did not know their alphabet)


(Check out the sale price!)

EASTER EGG CARDS

What else would you make?

For this project you will need:

Scrap Fabric
Plain Card with Envelope
Easter Stamps
Stamp Pad
Glue Stick
Tacky Glue
Exacto Knife
Card Stock
Tape

Draw a design for an egg on card stock and cutout.


Tape egg shape to front of card and cut out with exacto knife.
Watch your fingers!


Cut fabric 1/2" larger than egg.


Glue to inside of card with fabric facing down.


Measure inside of card then subtract 1/4". 
Cut cardstock to measurements from above.
Glue cardstock to in side of card to cover fabric.
Then glue cut out egg it inside of card.


Can you guess what this spells?


Who are you going to send your card to?


The story of Easter is the story of God's wonderful window of divine surprise. 
 ~Carl Knudsen

Wednesday, April 13, 2011

Felted Easter Eggs

It's that "Hoppy" time of year and Spring is in the air, so we are going to make felted Easter eggs.


What you will need:

Foam Pad
Wool roving
Felting needle

To start you will need a clump of roving.  If you are unsure how much wool you will need, start small.  You can always add more woll.  Lightly pull the roving apart. 

Never cut the wool!  You know how long hair gets tangled, but short hair does not?  Think of your wool as long hair and learn to love the tangles.  BTW- Tangled is a cute little movie. 

Fluff the wool by pulling the layers lightly.


Next, roll the roving into a tight, round barrel shape.  As you are rolling tuck in the ends.

Needle the surface of the rolled-up wool.  Always insert the needle straight down and pull straight up.  In other works, in and out.  Since the felting needle is extremely thin, it is very easy to snap.  The needle is also VERY sharp, so watch your fingers.


While you jab, sculpt into an egg shape.  Your egg will become firm.
Once your egg is firm you can add the decorations.  Take thin layers of roving and jab into egg in your desired pattern.  Because the egg is already firm, there is no point to insert the needle all the way in.  


Here are a couple of extra friends.


It's so much more friendly with two.
Winnie the Pooh