Thursday, October 27, 2011

Fabric, Crafty Business Cards


Do you ever have a need to hand out business cards?
Sure you do!

When you go to
The Market
Play Dates
Craft Stores
or other Blog Conferences

Someone is going to ask "what do you do"?

Now you will have a crafty business card to whip out
and proudly say I am a BLOGGER.
This will make you sound and look like a real business.

Melissa over at MOMCOMM has a wonderful post on

I wish we knew about Melissa before we made our cards.
(next go round we will have everything correct)

How did we make our Fabric Business Cards?

We designed our business cards to look like our blog.
Printed them out on our home printer.

Now comes the fun part.
Choosing fabric
We have a fabulous stash of fabric.
In our other life we make pillowcases for

These are the fabrics we chose for our cards.


Must say perfect color match!

Iron fabric
we used our handy dandy

Lay out the fabric right side down.
Spread glue onto the center back of a business card.
Make sure not to get the glue along the edges.
Sewing over glue is not a great idea.

Cut around business cards with pinking shears.
This will help fabric from ripping.


Now you get to show off you sewing skills.
You do not have to be a pro at sewing.
This would be a great project for a beginner.
Choose a thread with contrast.
Sew around the card making sure not to get too close to the edges.
Trim left over thread.


TA-DA you are now official,
so be proud to hand out your
Business Cards.


Every woman should have 4 pets in her life.
A mink in her closet,
A jaguar in her garage,
A tiger in her bed,
and A jackass who pays for everything.
~Paris Hilton

Wednesday, October 19, 2011

Trick or Treat!?


How do you like our Halloween Cottage?

Trick?
or
Treat?

BOTH!

It is

The trick is...
The Cottage is made of durable plastic!
No Baking


The treat is
The Cottage is
Ready to Decorate
Snaps together in seconds
Sturdy walls and roof will not collapse
Reusable
Wash it off and decorate
again and again...


Now for the fun job
Decorating!
It is so simple and easy.
Grab a can of frosting and candies.
That's right, no need for special frosting or candies.
We took a trip to the dollar store for all of our supplies.
(we had food colors on hand)

The only hard part was not tasting all of the goodies.


We added black food color to the frosting for the roof.


Top with candy corn, ju ju beads and grape Mike & Ike's.


BOO!
Don't be scared.  He's a friendly ghost.
Made with Smarties and a dot of black frosting.


 Our Stucco is frosting with orange food color.
How do you like our pumpkin garden?


Now for the real treat.
You can win your very own

There are 5 ways to win.
Leave a comment on how you would decorate your
That is a total of 5 ways.
Leave a comment for each chance to win.

We will be drawing on Tuesday, November 1st.

We can not wait to hear all of your decorating ideas.
Next month be on the look out for our
Thanksgiving Cottage.

Quote from Shrek
(we all need a little love)
Gingerbread Man: Wait! More sugar.
Muffin Man: But that is not the recipe.
Gingerbread Man: Trust me, Muffin Man, this girl's gotta be real sweet. I want someone who will love me forever.
Muffin Man: I must warn you, Gingy. No one has ever made cookies with this much sugar. You are tampering with forces far beyond your comprehension!
Gingerbread Man: Just put her in the oven.

Tuesday, October 18, 2011

Corny Muffins

How many of us lead busy lives?
We do!
In fact we have been so busy we have not had a chance to blog!

Yikes!
Zonkers!
Woa!
But, we are BACK!

Today we are making a quick dinner for the family on the run.
A dinner that you can eat on the run.

Corny Muffins

Corn muffin Box Photo
Ingredients:
2 boxes of corn muffin mix
(Jiffy is always our choice.)
and ingredients to make muffins
1 can of corn drained
1 cup of cheddar cheese
1 pack of hot dogs sliced
1/2 cup butter melted

Mix corn muffin mix and add corn and cheese.
Fill half of muffin cup and top with sliced hot dogs.


Cover hot dogs with more corn muffin mix.
(we like to add a little extra cheese)
Bake according to directions on muffin mix.
Top with melted butter.


You can even add a little frosting
(ketchup)


Check out the cute little corny breads.


Serve with tater tots and enjoy.


Ask any carny — a corn dog isn’t just batter fried meat on a stick; it’s the filet mignon of the carnival world.

Friday, October 7, 2011

Bacon Chocolate Chip Cookies

Welcome to the 2nd month of the  
Photobucket

Boy do we have a surprise for you!


Yes, you did hear that right!
We were thinking-
What could make a Chocolate Chip Cookie better???
BACON- is our answer!
(okay to be totally honest bacon is always our answer)
Check out our

Because the rules state our recipe must be found on another blog we started our search. 
What wonderful blogs are out there, but our favorite recipe came from
Here are a few of his yummy recipes with bacon
And oh so many more...

Bacon Chocolate Chip Cookies
**we did make a few changes - see below**
Ingredients:
1/2 cup butter (softened, feel free to replace some with bacon grease)
1/2 cup brown sugar (packed)
1/2 cup white sugar
1 egg
1 teaspoon vanilla extract
1 1/8 cup all purpose flour
1/2 teaspoon baking soda
1/4 teaspoon salt
1 cup dark chocolate chunks
5 strips, chopped bacon (Candied Bacon)

Directions:
1.  Cream the butter and sugar in a bowl.
2.  Beat in the egg and vanilla extract.
3.  Mix the flour, baking soda and salt in another bowl.
4.  Mix the dry ingredients into the wet.
5.  Mix in the chocolate and the bacon.
6.  Place the dough onto a cookie sheet one table spoon at a time.
7.  Bake in a 350 degree F preheated oven for 8-10 minutes.

Look you can see the bacon in the cookie

Our changes-
**Browned Butter-  Brown the butter in a heavy-bottom saucepan over medium-low heat.  Pay close attention (it can be hard to see the browning because of the foam).  About 3-5 minutes or until the butter has a nutty smell.  Let cool.

**Milk Chocolate Chips, because that is what we had on hand.

**Before baking- chill dough for about 20 minutes, then shape into balls and place onto parchment-lined baking sheet.  (Now is the time to freeze.  Place balls into freezer.  Once frozen store in Ziploc bags.)

**Extra melted Chocolate Chips for garnish- follow directions on package to melt. 

**Dip fork into melted chocolate and drizzle over cookies while they are cooling.

**Extra Candied Bacon for garnish and nibbling while cooking.

**We do not recommend using a plastic sandwich bag to drizzle the chocolate.  Our bag kept bursting and gave us big plops of chocolate.  Not quite the look we were going for. 

This is the look that we were going for

TA-DA


 Stressed spelled backwards is DESSERTS. Coincidence? 
 I think not! 
~Author Unknown


Wednesday, October 5, 2011

TV-Tray Ironing Board

 How many of you have these ugly
TV-Trays that you use for
this and that?


How about putting it to good use
by turning it into a
TV-Tray Ironing Board


This is such a quick and easy project.

Items needed:
Old TV tray (or new)
Therma Ironing Board Cover Fabric
Cotton Padding
Cotton Fabric
Staples/Gun (heavy duty)
Hammer

Place tray upside down on Padding
and trace around giving about 2"
on each side and cut out.
Staple to tray.
Hammer staples into tray.
Do the same with the
Ironing Board Fabric
and Cotton Fabric.


Tray covered with padding and iron fabric.


Stapling


You might need to hammer down (we did).
How do you like our hammer???
A girls gotta have Girly tools!


Make sure to get the fabric good and tight.


FINI!
Now you can have a cute Ironing Board that fits into small spaces too.

Do not wait to strike till the iron is hot;
but make it hot by striking.
'William Butler Yeats'

Sunday, October 2, 2011

Olive Penguins


We were so excited to be asked to host a
Chef Boyardee House Party
We knew we wanted to go with an
Italian dinner, but we wanted to show that with the
same recipe you can have and
adult dinner party
and a fun family dinner.
What do we do for a kids appetizer?
Hummm...
We remember a while back seeing
Olive Penguins
These little guys were so simple.
With a little help from you
your little guys can make this dish themselves.

It is never too early to teach a child it is fun to cook!

Ingredients:
**we did make a few changes**
Olives- Large & Medium (drain)
Mozzarella balls (small)
Italian Dressing
Carrots
Tooth Picks

1.  Marinade the Mozzarella balls in the dressing for a couple of days.
2.  Scrape the out side of carrots and cut into disks.  (this is were you help out)
3.  Cut small "V" out of the disks.  This will make the feet and beak.
4.  Make a small slice into Large olive and place 1 or 2 mozzarella balls into olive.
5.  Place carrot "V" into hole in Medium olive.  This will make the beak.
6.  Attach Medium olive to Large olive with beak facing out with toothpick
make sure to catch cheese with toothpick.
7.  Push toothpick through carrot disk.

Now you have tasty
Olive Penguins


It's practically impossible to look at a
penguin and feel angry.
Joe Moore

Saturday, October 1, 2011

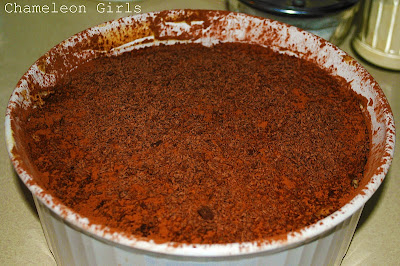
Easy Tiramisu


 For our Chef Boyardee Party we wanted a
quick, simple, easy, and tasty dessert.

So what comes to mind when you think dessert for an
 Italian dinner?

Tiramisu

Not only is this recipe easy
 it is perfect for entertaining
because it will be a big hit
and it can be made the night before.
(leaves you more time to enjoy yourself)

Ingredients:
16 oz mascarpone cheese
1 cup vanilla pudding
1 Pound Cake
3/4 cup espresso or STRONG coffee
1/2 oz Kahlua or Coffee Liqueur
cocoa powder
chocolate bar

Directions: 
  1. Bring the mascarpone cheese to room temperature.
  2. Brew the espresso/coffee.  Add the Kahlua to the coffee and let cool.  While it is cooling sit down and enjoy a cup.
  3. Cut cake into about 1" strips.
  4. Put the mascarpone in a bowl and beat with a mixer just until it is light and fluffy.  Fold the pudding into the mascarpone until well mixed.
  5. Spread a little of the mascarpone mix into the bottom of the serving dish. 
  6. Dip the cake quickly into the espresso.  Place cake strips on top of the mascarpone mix. 
  7. Top with another layer of mascarpone mix
  8. Repeat layers.  Last layer should be the mascarpone mix.
  9. Sprinkle with cocoa powder and top with shaved chocolate
  10. Place the tiramisu into the fridge and chill for a few hours.
Quick Tips

**Use a sifter or strainer to sprinkle the cocoa powder- this will help the cocoa come out fine and without clumps.
**To make chocolate curls use a potato peeler or cheese grader for a fine chocolate shaving.
**Don't soak cake or it will get soggy.

 
Buon appetito!
 
 Sleepless in Seattle
[Jay is helping Sam get back into the dating scene]
Sam Baldwin: What is "tiramisu"?
Jay: You'll find out.
Sam Baldwin: Well, what is it?
Jay: You'll see!
Sam Baldwin: Some woman is gonna want me to do it to her and I'm not gonna know what it is!