Pages

Saturday, December 31, 2011

Wine Jelly


Today we are making Wine Jelly
Any type of wine can be used.
Red, White, Rose, Champagne
 
Wine jelly is great for cooking sauces
 and wonderful with cheese, crackers and wine,
or even with peanut butter.


Ingredients
3 1/2 cups wine
1/2 cup fresh lemon juice
1 package dry pectin
4 1/2 cup sugar 
1 pat of butter (about 1 teaspoon)
Paraffin Wax

Directions:
  Combine wine, lemon juice, and pectin in a large saucepan.  Bring to a boil stirring frequently.  Add sugar, stirring constantly until dissolved.  Add pat of butter
Return to a rolling boil.  Once at a rolling boil, boil hard for 1 minute, stirring constantly.  Remove from heat.  Skim foam off top, if necessary. Ladle jelly into hot sterilized wine glasses leaving about 1/2" from top.
Once the jelly has cooled and set pour about 1/8" paraffin
wax and let harden.  Pour another 1/8" to seal top.


Tie with a ribbon to make a great presentation.


Wine improves with age.  The older I get, the better I like it. ~ Anonymous

Tuesday, December 27, 2011

Cookie Exchange Idea

Did someone say Party?
Love a good Party.

Is there better time of year to get together
with family and friends and share your favorite
cookie recipe?

This is our recipe that we are sharing with our friends.


What goes better with cookies that a glass of cold milk?
NOTHING!

We are going to show you a special way to serve milk
at your Cookie Exchange Party.


Plastic Wine Glasses
White Frosting
Sprinkles

Pour the sprinkles onto a small plate or bowl.
Spread a think layer of frosting onto each glass.


Dip each glass into the sprinkles to cover frosting.


Now you have a fancy glass even the kiddos can enjoy.

Just think Santa might leave a extra goodie for
parents that put that much thought into his
cookies and milk.


At the end of each post we like to share a favorite quote
so this is our Christmas gift to you-


hrhughes:

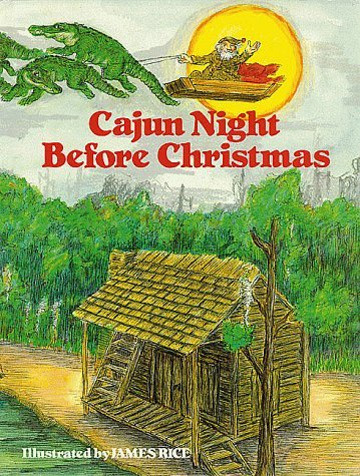
CAJUN NIGHT BEFORE CHRISTMASBy Illustrated by James Rice

Monday, December 19, 2011

Color Picture


Each year parents are looking for ideas
for their children to make as
Holiday presents.

Is Mary the next Renoir?
Johnny- Degas?
Trent- Cezanne?
Piper is our next Monet.

For this project you will need:
COLORS
 CANVAS 
(3 for $5 at Hobby Lobby and 40% coupon)
IRON 
WAX PAPER
PENCIL SHARPNER(for shavings)

For this project you are going to use
shavings of the colors. 
We used 2 boxes of 64 colors.
Look how yummy the colors look!
Yes, it did take awhile to shave each color,
but well worth the time.
Plus it will keep your little ones 
quite and still
for a little bit of time.

Have your child draw a design on the canvas.
This is their project but try and stress a
BIG picture is better.

Sprinkle the color shavings on the design.

Try to cover the canvas with colors without white showing.

Cover the canvas with wax paper
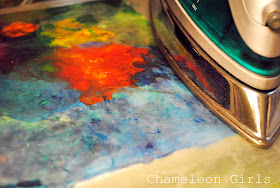
and iron until the colors melt.

Carefully check to see that the colors have melted
by lifting the wax paper.

If the color has not melted all of the way
lay the wax paper back down and re-iron.

To add a little extra pazzaz
wrap the edges with ribbon and tack down with


Now your child has their very own master piece.


~Claude Monet

Saturday, December 10, 2011

Cookie Burst


Are you looking for a super easy cookie recipe?
Here it is!
And it only takes 4 ingredients!
And has a BURST of Flavor!
What more could you ask for?
What flavor will you use?
Lemon, Strawberry, Chocolate


Ingredients:
1 box cake mix
(we used lemon & strawberry)
8 oz cool whip
1 egg
1/3 cup powdered sugar

Directions:
Preheat oven to 350.
Beat together egg, cool whip and cake mix until well blended in medium bowl. 
Dough will be thick.
Drop by teaspoons full into powdered sugar.  
Roll in sugar to coat.
Place on parchment paper lined baking sheet.
Bake 10 - 12 minutes.


Wednesday, December 7, 2011

Tootsie Roll Fudge


Do you have a childhood memory of a special candy?
Mine is Tootsie Rolls.

I always have a candy dish full of Tootsie Rolls.

Take a peek at how you can make your own
 Cheery O Bowl

I found this wonderful recipe from Camie at
Home Cooking For Six

Ingredients:1 teaspoon plus 2 Tablespoons butter, divided
2 cups Tootsie Roll Midgees
2-3 Tablespoons peanut butter
3-1/2 cups confectioner's sugar
2 Tablespoons milk (or to desired consistency)
1 teaspoon vanilla
1 cup chopped nuts (if desired)
Candy to decorate or mix within
(Heath bar, M&Ms, Peanut Butter cups, Reese's Pieces, etc)

Line an 8" square pan with foil.  Grease the foil with 1 teaspoon butter, set aside.
In a heave saucepan, melt the butter, Tootsie Rolls, peanut butter and remaining butter
over low heat, stirring constantly.  Remove from heat.  Gradually stir in the
confectioner's sugar, milk and vanilla (mixture will be VERY thick). 
Mix with hands on counter top.

Fold in nuts or candy (optional).  Spread into prepared pan.
Top with candy, if desired, OR using a sharp knife, score the surface into 1" squares.
Press candy into the center of each square.  Cool.  Using foil, remove fudge from pan.
Cut into squares.  Store in an airtight container.


Photobucket


Tuesday, November 22, 2011

Glitter Finger Polish Tacks

What girl doesn't like a little bit of GLAM in her life?
We do for sure!
So what a better way of using 2 of our favorite things...
GLITTER
&
FINGER POLISH
to make fancy thumb tacks.

This is such an easy project and if you look hard you
might have everything you need around your house.

Thumb Tacks
Glitter
Finger Nail Polish

Paint the thumb tack with finger nail polish.
Don't forget the sides.
Dip into the glitter while still wet.
Stick tack into a piece of card board to dry.

How will you use your
Glitter Finger Polish Tacks?

As a boarder for a picture canvas?


Holding your favorite piece of artwork on your


Or give as a present?
A great way to present the tacks is to
wrap a piece of card board with
scrapbook paper or wrapping paper
and stick in the
Glitter Finger Polish Tacks.

All that is gold does not glitter